Why your PDF printout is cut off at the edges
The PDF looks complete on your screen. On paper, the final line is gone, a table loses its right-hand column, or a border stops halfway around the page. Printing the whole document again with the same settings is unlikely to help. First, find out whether the missing material disappeared before printing, during page scaling, or somewhere between the preview and the printer.
For a reading copy, a fit-to-page setting is a useful comparison. For a sewing pattern, shipping label, calibration template or scale drawing, making everything fit can quietly make the document unusable. This guide keeps those two situations separate. Work on a saved copy, change one setting at a time, and test one affected page before committing to the full job.
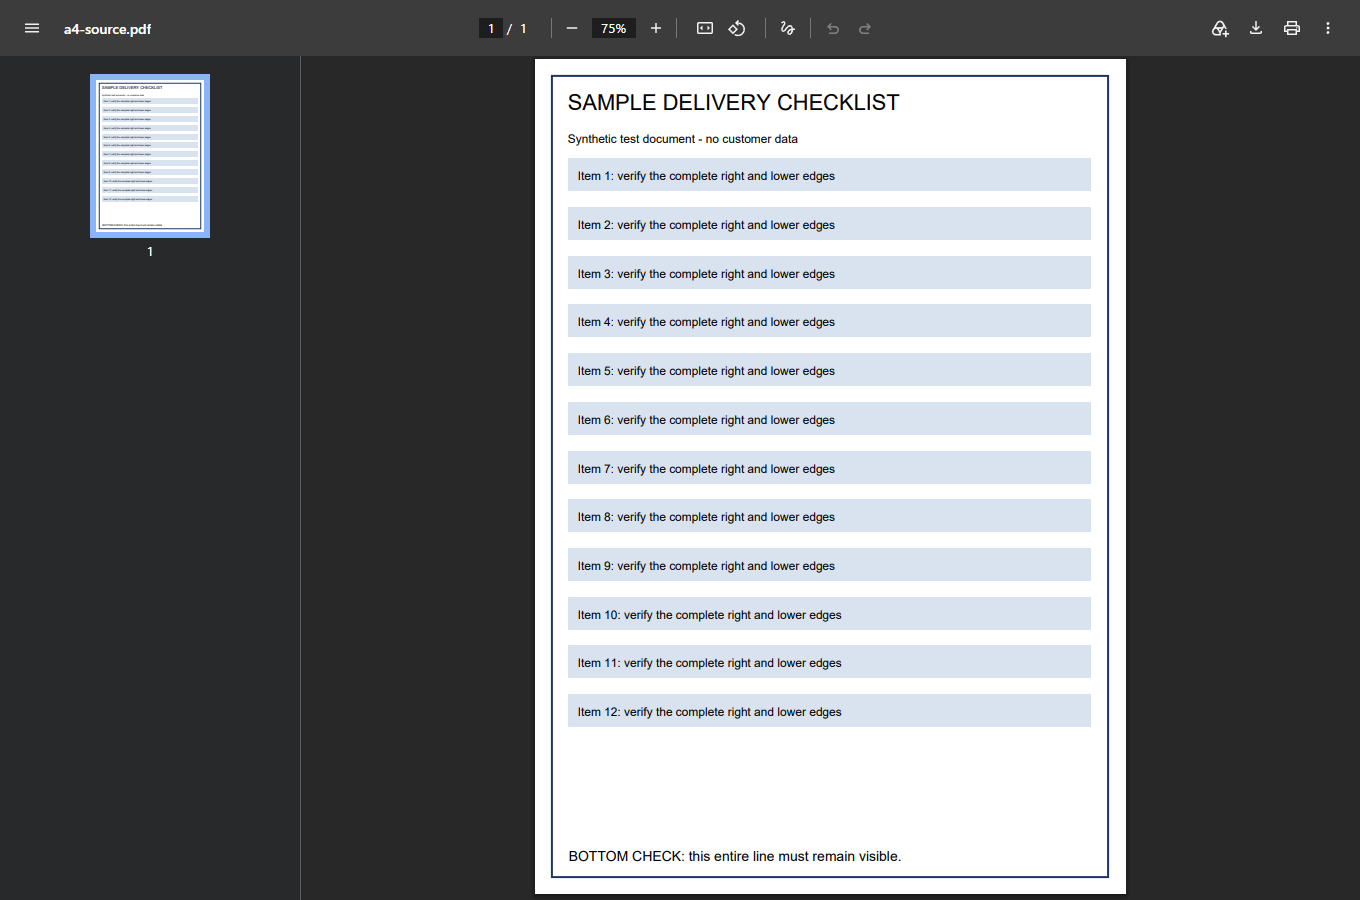
Find the point where the page becomes incomplete
Open the original PDF, not a screenshot of it and not the website surrounding an embedded viewer. Look at the exact page that failed. Zoom in enough to read the last line and pan to each edge. Is that line actually present in the file? A browser window that shows only part of a page can be misleading; scroll before deciding that the file is cropped.
If the text is missing in the saved PDF itself, stop changing print scale. Scaling only makes existing content larger or smaller. It cannot restore a footer that was lost when someone exported a spreadsheet or cropped a scan. Ask the sender for a fresh export, identifying the page number and the missing content. If you created it, return to the original document and inspect its export or print area.
If the whole page is visible, open the print preview. Now compare the same landmarks: the first line, last line, rightmost table column and any page number near an edge. If the preview clips them, you have a layout or scaling problem to investigate before using paper. If the preview includes them but the printed sheet does not, keep that distinction. It narrows the next test to the output destination, driver settings or printer rather than the PDF content alone.
Check these settings before changing the document
Write down the current settings or take a private screenshot of the dialog. This gives you a way back if a change makes matters worse. Do not share a screenshot containing a confidential document or a network printer address when asking for public help.
- Destination: select the printer you intend to use. A virtual PDF destination is useful for a comparison, but it does not establish what a physical printer can print. Settings remembered for a previous destination may not be appropriate.
- Paper: match the selected size to the paper actually loaded in the chosen tray. “A4” and “Letter” are different sizes even though both look like ordinary office paper. Check the tray as well as the application if your printer has more than one.
- Orientation: check portrait versus landscape. A wide table on a portrait sheet can become very small when fitted, or lose its side at full scale. Do not rotate the source merely because the current preview is wrong.
- Scope: select one affected page and one page per sheet for the first test. Make sure you have not selected only a highlighted area, a booklet arrangement or an unrelated page range.
- Scale: note the current option and percentage. Compare the preview before and after changing it. A result that looks less cropped but is much smaller is not automatically the right result.
Inspect the retained modeled clipping fixture
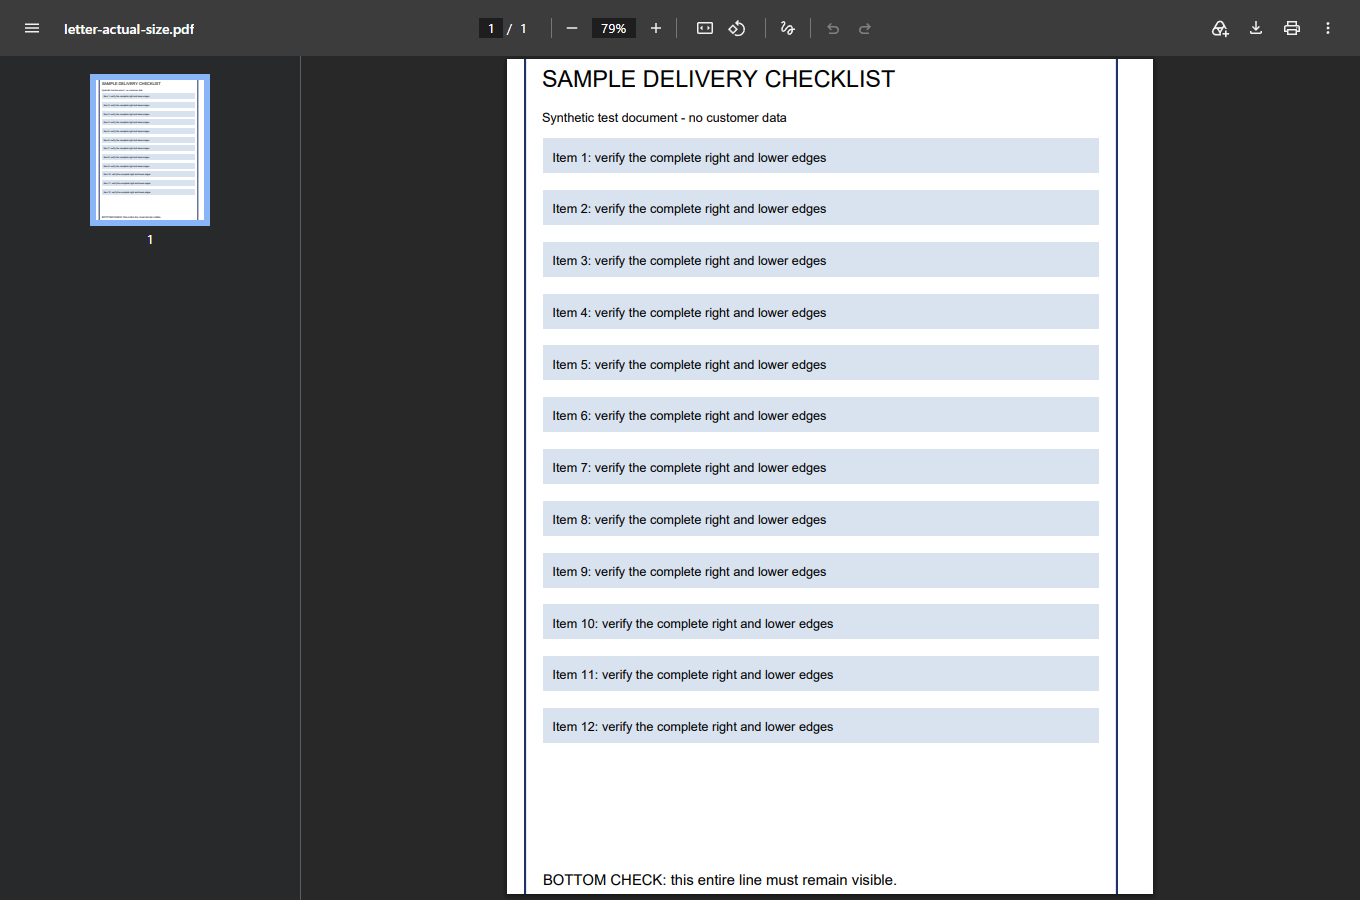
Choose Fit or Actual size for the job, not out of habit
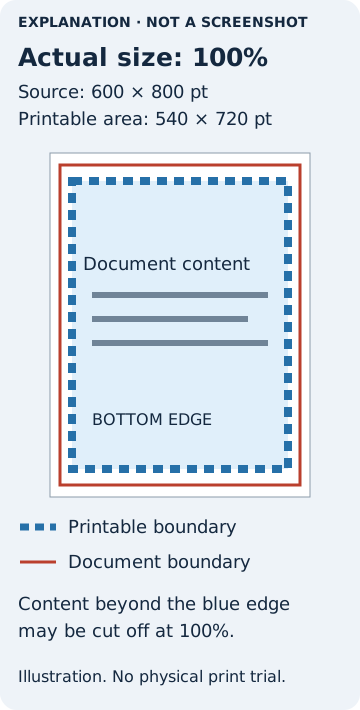
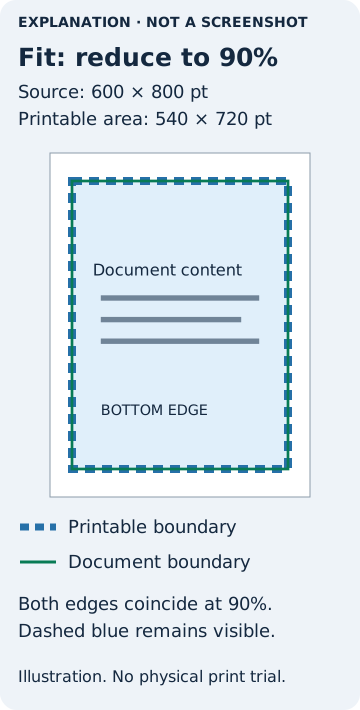
In Acrobat's print dialog, the sizing controls are under Page Sizing & Handling → Size. Adobe distinguishes four choices: Fit adjusts a page to the printable area, Actual size leaves it unscaled, Shrink oversized pages reduces pages that are too large without enlarging smaller ones, and Custom Scale uses your selected percentage. Material outside the available area can be cropped at Actual size. These are print settings, not a repair to the original PDF. See Adobe's page-sizing documentation for its current controls.
For an invoice, article or instruction sheet, compare Fit with the original setting. The question is whether all the needed content is now present and comfortably readable. Examine a dense table as well as the margins. If fitting preserves the page but makes essential text too small, use a more suitable paper size or obtain a better laid-out source. Do not solve clipping by turning the document into unreadable small print.
If you are using Chrome, open the PDF and use its print control, or the browser's Print command. Google documents Ctrl+P on Windows and Linux and ⌘+P on Mac, followed by destination and print settings. The controls available depend on the document and destination, so use the labels actually shown in your dialog rather than expecting Acrobat's layout. Google's printing instructions describe that entry point.
A PDF may also have its own print defaults. If you close and reopen the dialog, check that your intended settings are still selected. Before printing, confirm that the destination, paper, page range and scale still match the preview you checked.
Same document, two sizing choices
These are author-created explanations, not screenshots of Acrobat. In this example the source is 600 × 800 points and the printable area is 540 × 720 points. Actual size retains 100%; Fit uses 90%. Your printer’s printable area may differ.
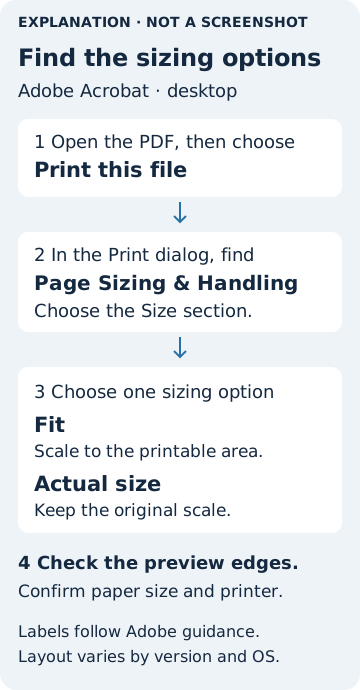
- Open Acrobat’s Print dialog and find Page Sizing & Handling → Size.
- Select Actual size. Check whether any required content falls outside the preview’s printable area.
- Select Fit. Compare all four edges and the smallest text. Do not assume a smaller page remains readable.
- For patterns or scale drawings, follow the author’s scale instructions instead. A physical ruler check is still needed.
The diagrams explain the sizing choice. Confirm your own result with one printed page before sending the full job.
Inspect the retained scaled PDF fixture
Why A4 on Letter can lose more than you expect
The screen fits a page into a window without caring how large the sheet will be. Printing has to place that page onto a physical area. There are three sizes to keep apart: the PDF's page, the selected sheet, and the portion of that sheet the printer can mark. Matching the first two is not enough if important content runs into a non-printable edge.
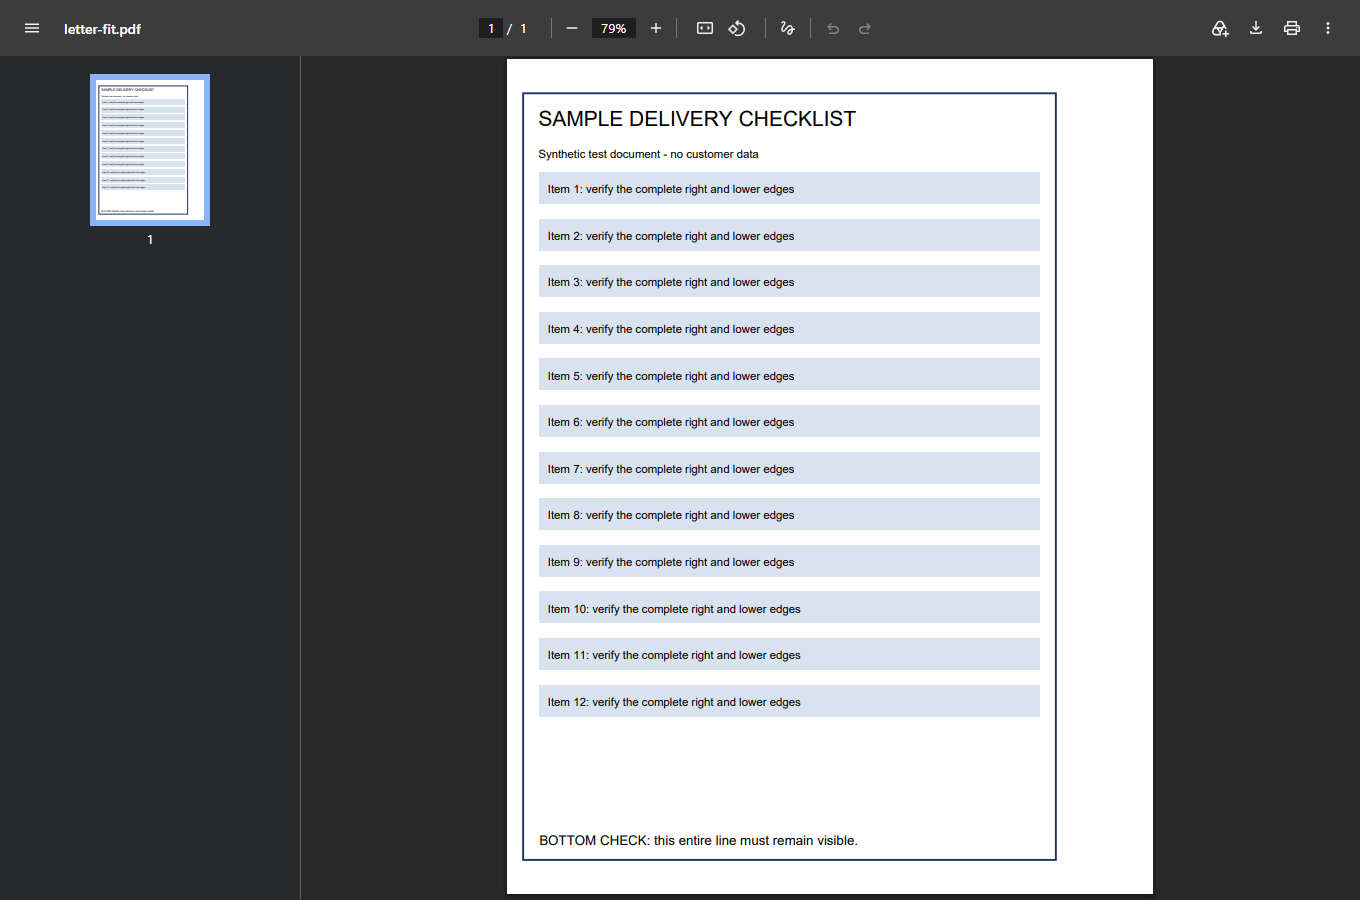
Our earlier reproducible geometry example used an A4 page measuring 595.2756 × 841.8898 PDF points. A US Letter sheet is shorter. In a deliberately simplified model, we allowed 18 points of margin on every side of the Letter sheet, leaving a 576 × 756-point usable rectangle. To keep the whole A4 page within that rectangle, both dimensions must fit. The limiting dimension in this example is the height.
The calculated scale is approximately 89.80%. At that scale the page is about 534.545 × 756 points. At 100%, its height exceeds the modeled usable height by about 85.890 points. This is why a document can look almost the right size and still lose meaningful material. The illustration below preserves that calculation as a supporting explanation; it is not a screenshot of your printer's capabilities.

Your preview may show a different percentage. That does not invalidate the comparison: your paper, document boxes, printer margins or driver settings may differ. Avoid copying 89.80% as a universal fix. Let the actual preview guide an ordinary reading copy, and verify physical dimensions when the document's scale matters.
When shrinking would create a worse problem
A pattern piece can look perfect on the sheet and still be the wrong size. In the geometry example above, a 100 mm reference line becomes about 89.80 mm after fitting. That is a substantial error if the line is a cutting guide. A scaled label may also need to meet requirements from the organisation that issued it. The fact that all its edges are visible does not prove it is acceptable.
Follow the document author's printing instructions. If they specify 100% or Actual size, preserve that scale and check a printed reference mark with a physical ruler. Measure in both directions if the document provides a calibration box. Do this before assembling a multi-page pattern or relying on the drawing. Screen zoom is not a substitute for measuring the printed result.
If the required page does not fit your available paper at its intended scale, the next step is suitable larger paper or an approved tiled-print workflow, not arbitrary shrinking. Acrobat provides a Poster mode for splitting a large page across sheets, with controls for scale, overlap and assembly marks. Adobe's large-document instructions explain these options. Check the author's requirements before using them, and verify one calibration area before printing all the tiles.
Check the result, then print the rest
Use the single-page result as a small acceptance test. Compare it with the original PDF, not just with your memory of the failed printout. Read the bottom line, locate the page number, check all columns, and look for anything pressed against the edge. If scale matters, measure the reference mark. If text is too small, treat that as a failure even when nothing is technically missing.
For a long document, also inspect a page with a different layout before sending the entire job. A landscape appendix or larger engineering sheet may behave differently from the first portrait page. Adobe documents choosing a paper source by PDF page size for mixed-size documents. That option only helps if the intended paper and a suitable output setup are available; it is not a guarantee that every page will fit the tray you have loaded. See the mixed-page-size workflow.
Keep the successful setting details with the file if you will print it again. Record the application, printer, selected paper and scale. This small note is more useful than repeatedly altering the source PDF until one particular printer happens to accept it.
If the preview is right but the sheet is still wrong
Do not keep reducing the scale blindly. Try the same saved page in another trusted PDF reader, with the same printer and paper. That is a controlled comparison: if only one application fails, its print path or settings deserve attention. If both fail in the same way, check the printer manufacturer's instructions for the exact model, driver and paper type. Avoid changing several system-wide printer settings at once.
A virtual PDF output can help you inspect what a software path produced, but it cannot test ink placement, paper feed, borderless support or the printer's physical margins. Likewise, a screenshot of a complete preview is evidence about that preview only. Use the preview to narrow the problem, then check the physical result on your own printer.
There is a real-world counterpart in an Adobe community question about printing beyond the paper. It is useful context for the symptom, not a controlled test of your printer or proof of one universal solution. When requesting help, give the application version, PDF page size, paper size, scale, and whether the preview differs from the printed sheet. Those details distinguish a sizing mismatch from missing source content.
If the Print command is unavailable rather than producing a clipped page, start with PDF opening passwords and editing permissions. If the file is a scan, see why Find cannot see words in a scanned PDF. And if the browser displays a cover-page warning instead of the document, check PDF Portfolio support. These are different problems; changing print scale will not resolve them.